Season of Elegance

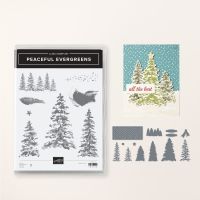
 Hello to my crafty friends. As promised, here is another creation using the Season of Elegance Suite that I made for my Christmas cards this year.

This card shows just how quick and easy it really is to create a beautiful Christmas card in a matter of minutes.

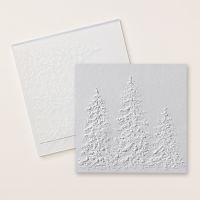
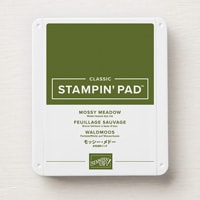
I stamped two of the largest trees from the Peaceful Evergreens Bundle using Mossy Meadow ink onto Mossy Meadow cardstock and die cut them out.  Next, I embossed a piece of Mossy Meadow cardstock using the Painted Trees 3D Embossing Folder.  The trees were then adhered to the embossed cardstock piece using Dimensionals.
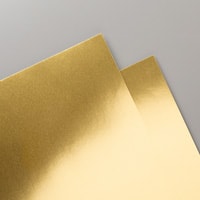
Next, I embossed "happy" in gold onto a piece of Basic White cardstock and die cut it out using the Peaceful Season Bundle and then snipped the tails off. I then added the completed layer to a Basic White card base with a small strip of Gold Foil Sheets on the righthand side of the card front.

Finally, I die cut an outline "Christmas" using Gold Foil Sheets and a Basic White cardstock for the outline piece.
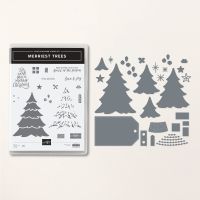
I decided a few snowflakes would look great against my mostly green scene so I pulled out and used the snowflakes from the Merriest Trees Bundle. Lastly, I was going to add some gold embellishments to the front of my card but the snowflakes were good enough. :)


Don't miss out on our FREE SHIPPING promotion going on only through today, Wednesday, 12/11/24!


Place an order of $50 or more using my December Host Code and you will receive a free gift valued at $10 from me as my thank you.  Please do not use my Host Code for orders of $150 or more so that you can earn Stampin' UP! rewards. You will still receive a free gift from me.  

Designer Series Special Release - while supplies last! 
Stampin' UP! is refreshing 3 designer series papers from the past in new refreshed colors! 


Last Chance Products are a new category on the Stampin' UP! website listing all of the retiring products from all catalogs and online exclusives.  Some products are discounted for extra savings!

This will be an ongoing category that will be updated every other month and products listed will be available only while supplies last.  Shop HERE!

Thanks for stopping by today!  Have a great day stamping!

Product List

Comments

Popular posts from this blog

Silly Old Bear Suite

 Happy Friday! Today, I have 2 very cute creations to share with you using the Silly Old Bear Suite . One Pooh Bear is a die cut right from the Silly Old Bear 12" x 12" DSP , while the other Pooh Bear is stamped in Early Espresso ink and colored with the new Golden Glow Stampin' Blends. Every image on 2 sheets of the Silly Old Bear 12" x 12" DSP can be die cut out using the Sweet Old Friends Dies !  How cool is that?! The first card I made (on the right side) uses the new In Color Crisp Cantaloupe.  I stamped the frame from the Sweet Old Words   Stamp Set using Crisp Cantaloupe and die cut it out using the coordinating Sweet Old Words Dies followed by another Crisp Cantaloupe cardstock layer.   I also die cut 2 honey pot images from the Silly Old Bear 12" x 12" DSP and a tree stump from the Sweet Old Friends Dies.    I created a 4 1/4" x 5 1/2" money holder card using a 7 1/4" x 5 1/2" piece of Crisp Cantaloupe cardstock scored ...

Quilt card

This is a quilt card I made back in January at my up line's (Chris Smith) home.  I added the embossed flower using  the Daydream Medallions stamp set along with the SAB stamp set Madison Avenue .  These two stamp sets work well together.  The flower petals were made with  the Floral Frames Framelits die.  I will probably store these two sets together. : )  Recipe: Daydream Medallions, Madison Avenue (SAB) and Vintage Verses (SAB) stamp sets; Sycamore Street DSP (SAB), Island Indigo and Tangerine Tango card stock; Island Indigo, Versa Mark pad inks; White Emb. powder, Floral Frames Framelits, Postage Stamp punch, Square Lattice Emb. Folder, Pool Party SAB button and Whisper White Bakers Twine. Enjoy your day!  I have limited time to create my youngest child's birthday card...which is tomorrow!  Happy Stamping, and hope you get to stamp a latte!

Lovely Arrangements Bundle

 Hello, crafty friends!  Today, I am sharing a birthday card I made for a friend using the Lovely Arrangements Bundle. These large and beautiful flowers are paired with the Lovely Blossoms 12" x 12" Designer Series Paper. The flowers were stamped using Secret Sea ink onto Basic White cardstock and were then colored with Cloud Cover Stampin' Blends. For fun, I added 1/2" punched circles to the centers of the flowers using retired Night of Navy glossy paper. The sentiment was stamped using Secrete Sea ink and was then cut down with my paper trimmer.  The flowers and sentiment were adhered to my card front using Dimensionals. For the background, I die cut 2 sets of Secrete Sea  cardstock "circle clusters" and adhered them to a rectangle die cut piece of Cloud Cover cardstock followed by 2 pieces of Lovely Blossoms DSP. Next, I added 3 sets of Old Olive die cut leaves around my flowers, a Night of Navy bakers twine bow, and a few white embellishments to finish...